Ideas Genie on the Web
by ideasforgardens.com

This site is dedicated entirely to users of Garden Software developed by ideasforgardens.com
If you DON’T already have a copy of our software, click on the following line:-
Ideas Genie- Software for Plant Lovers 

Home  About us   Ideas for Gardens   Cultivars   Garden Photos   Garden Software   Garden Paintings
Document Reference Lessons/Lesson3                                                   Issue Date 7th April 2003
Lesson 3 objectives: Link a Garden Area Photo to a Garden Area. “Quick Add” a Plant to the database using this program if it does not exist. Link a Plant to a garden area. Identify Plants in the Garden Area Photo by dragging rectangular shapes to set Co-ordinates to their position (Lassoo the plants??).
There are 18 steps in this Lesson.
 

Previous Step
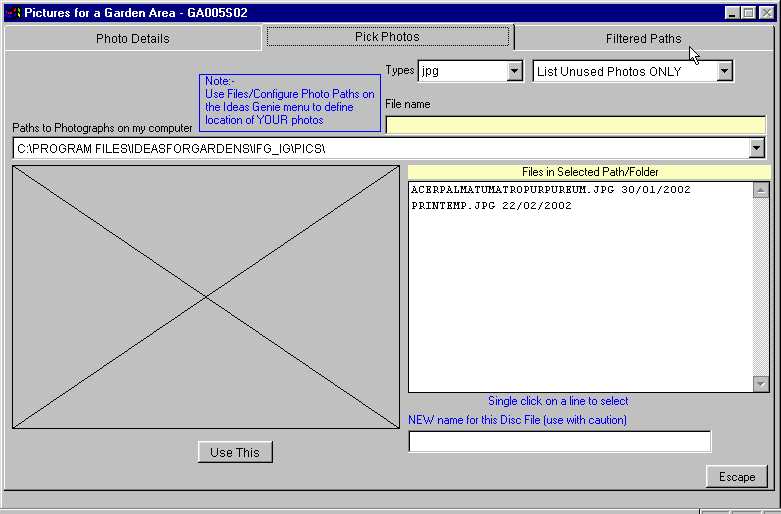
Step 3 A special kind of screen appears. This screen features what is known as a Page Frame. A page frame consists of multiple pages, accessed by clicking on tabs. Look along the top of the screen. There are three pages in this Page Frame. The tab names for the pages are “Photo Details”, Pick Photos” and “Filtered Paths”. Clicking on the tabs will expose Pages contents. You will be introduced to each of these pages in the following steps.
Note the “Paths to Photographs on my computer” caption and pop-up. We need to find the folder where the Photo is located on your computer. This screen will open initially with the MAIN “Path to Photographs” selected. The next few steps will show you how to add a new path to those listed in the Pop-up. Click on the “Filtered Paths” tab (see cursor, top right hand corner of screen)
Next Step

Home  About us   Ideas for Gardens   Cultivars   Garden Photos   Garden Software   Garden Paintings