|
Lesson 1 - This page
Lesson 2
Using
the program to organise your family photos
This project is discussed on our User Forum (May 2020).
Step 1: The title for this project
We will use the “Gardener” name to act as our family
name.
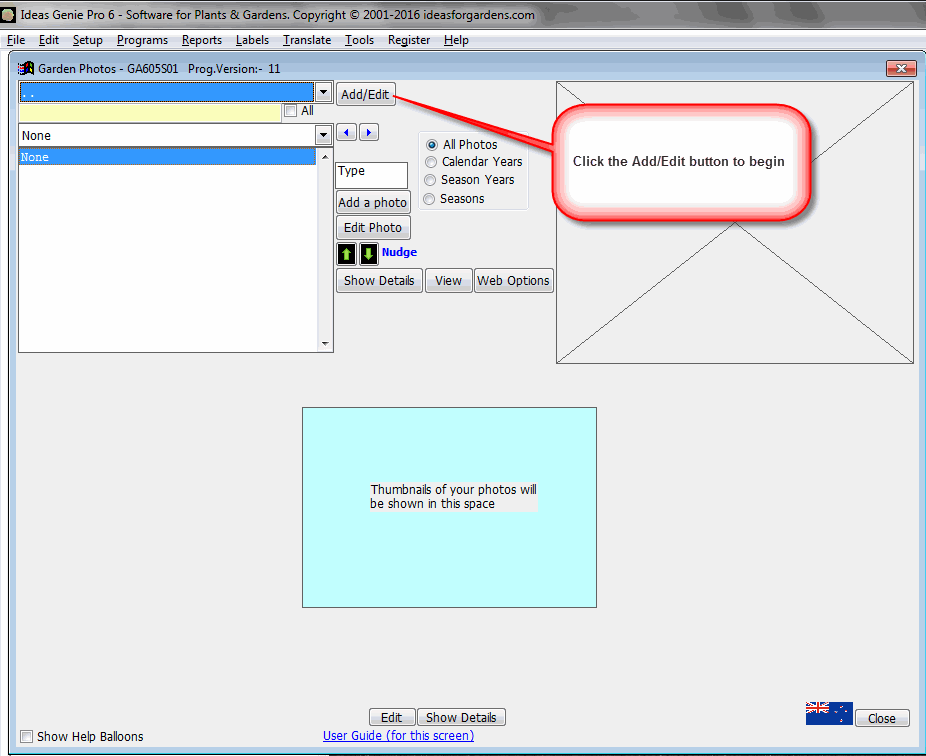
1.1 Start the program Garden Area Photos - GA605. The Initial screen looks like this:
Screenshot GA605S01-6
As
indicated in that screenshot, click the Add/Edit button
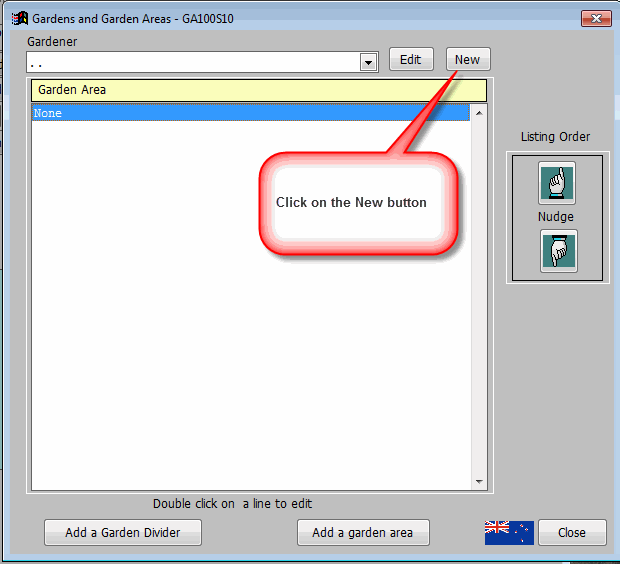
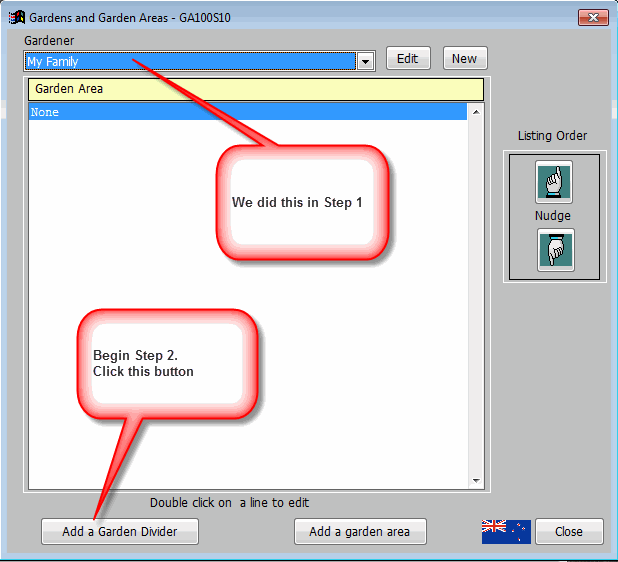
1.2 Screen GA100S10 appears
Screenshot GA100S10-2
As
indicated in that screenshot, click the New button
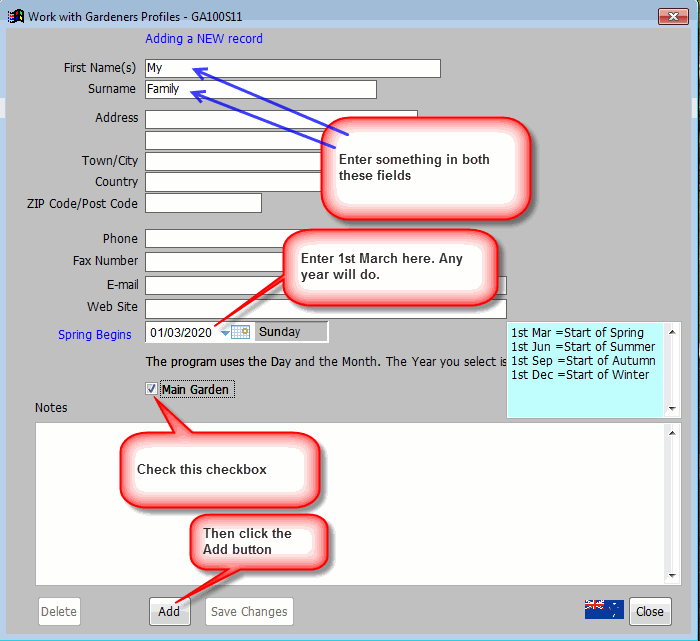
1.3 Screen GA100S11 appears
Screenshot GA100S11-2
As indicated
in that screenshot, fill in the required fields and click the ADD BUTTON.
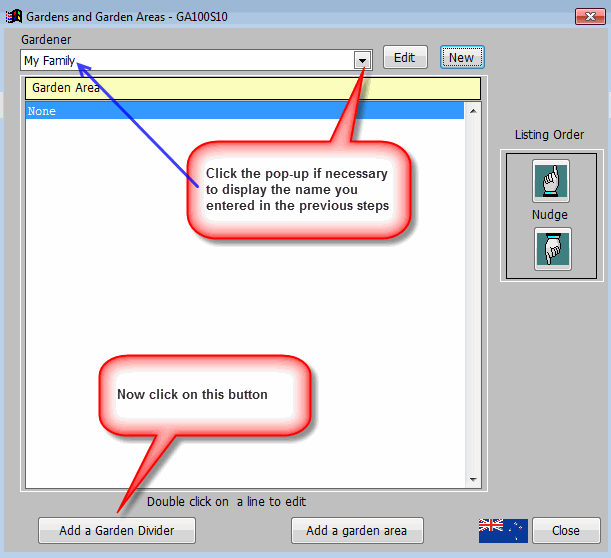
1.4 Screen GA100S10 re-appears, with the details you have entered above.
Screenshot GA100S10-3
Step 2: Adding Dividers
Think of Dividers as a sub group level for
Family names
2.1 Starting from screen GA100S10 where we left off in Step 1:-
Screenshot GA100S10-4
As indicated in
that screenshot, click the click the Add a Garden Divider
button
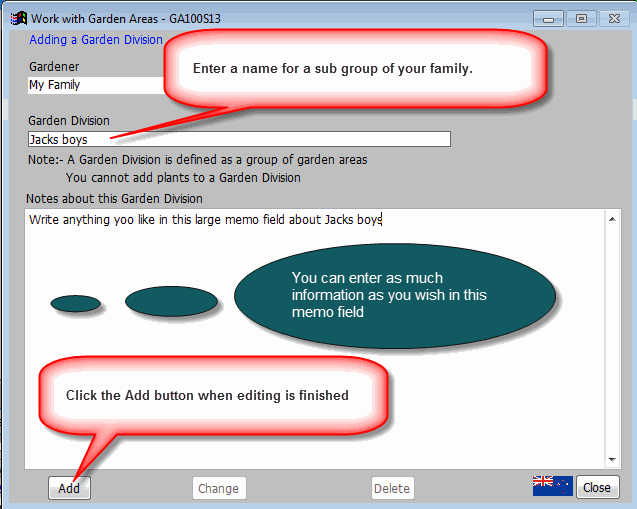
2.2 Screen GA100S13 appears
Screenshot GA100S13-1
As indicated in that screenshot, fill in the required
fields and click the ADD BUTTON.
Step 3: Adding names of family members
In this project, we think of Garden Areas as Family names
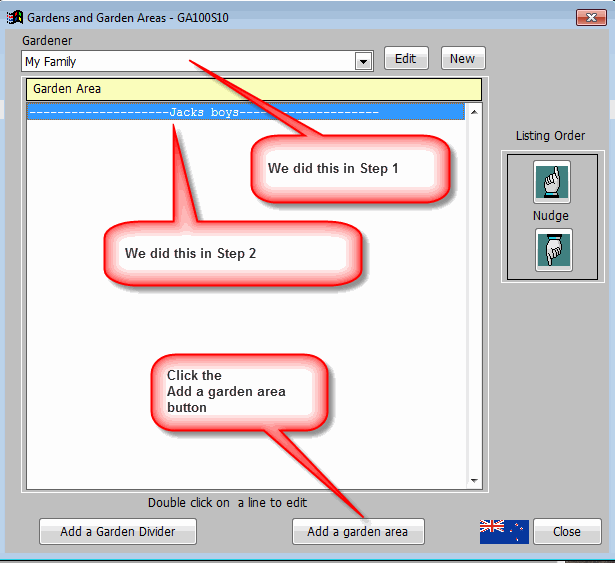
3.1 Starting from screen GA100S10 where we left off in Step 2:-
Screenshot GA100S10-5
As
indicated in that screenshot, click the click the Add a garden area
button
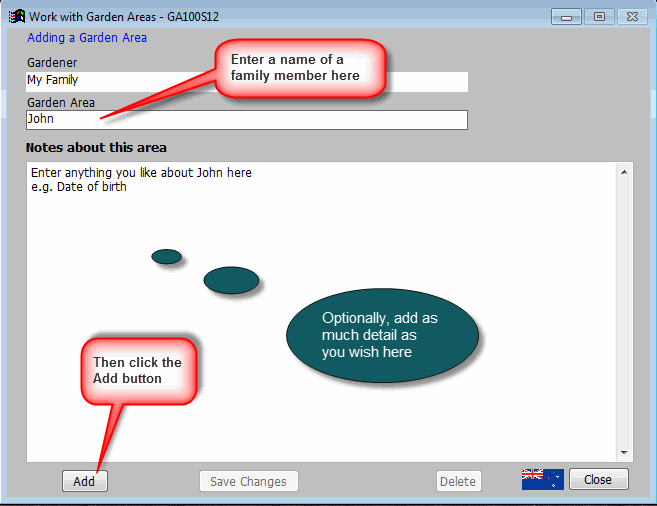
3.2 Screen GA100S12 appears
Screenshot GA100S12-5
As indicated in that screenshot, fill in the required
fields and click the ADD BUTTON.
Step 4: Adding names of family members
Repeat steps 2 and 3 to build
up a list of your family members.
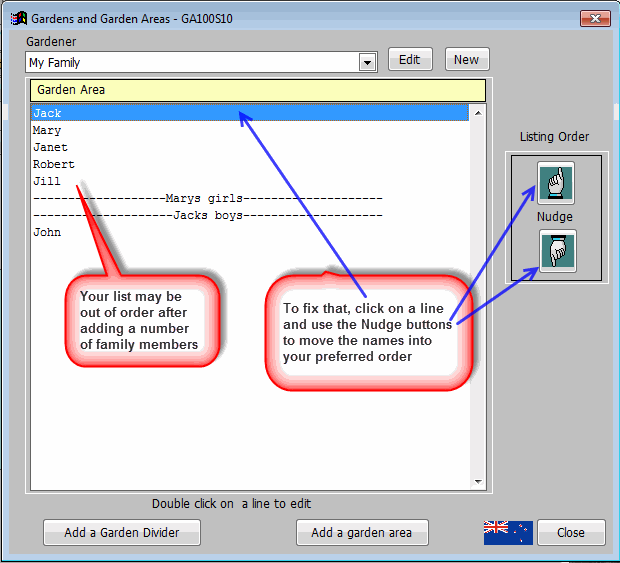
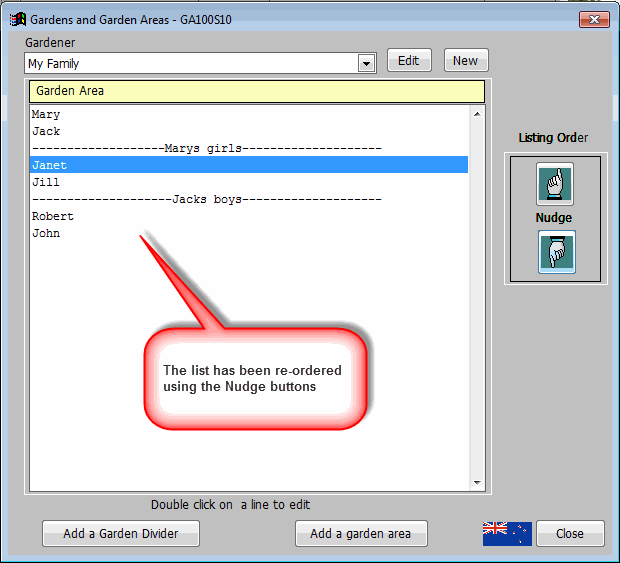
Step 5: Using the Nudge buttons
When you add a number of names, the list will be out of order
BEFORE: Screenshot GA100S10-6
As indicated in the
screenshot, use the Nudge buttons to reorder the list.
AFTER using the Nudge buttons: Screenshot GA100S10-7
You can now proceed to Lesson 2.
Go to Lesson 2
Main screen for this program
|
