|
About the screen GA100S23
This is a common screen, shared by a number of programs.
e.g. this screen is displayed when:
- You click on the name of a plant in GA604S01 (Plants and Gardens program)
You click on the Add a specimen line
- You edit a plant in GA604S01 by clicking Edit (Plant Profile) in the Toolbar GA100S70
get to screen GA100S36 (the plant profile screen)
click the Specimens (Tab)
button
then click the Add (a specimen) button or double click to edit an existing specimen
This screen features a Page Frame with 7 pages:
- Plant Profile page
- Location page
- Supplier page
- Specimen Notes page
- Specimen Events page
- Pot History page (Bonsai Genie only)
- Batch page
In this screen:
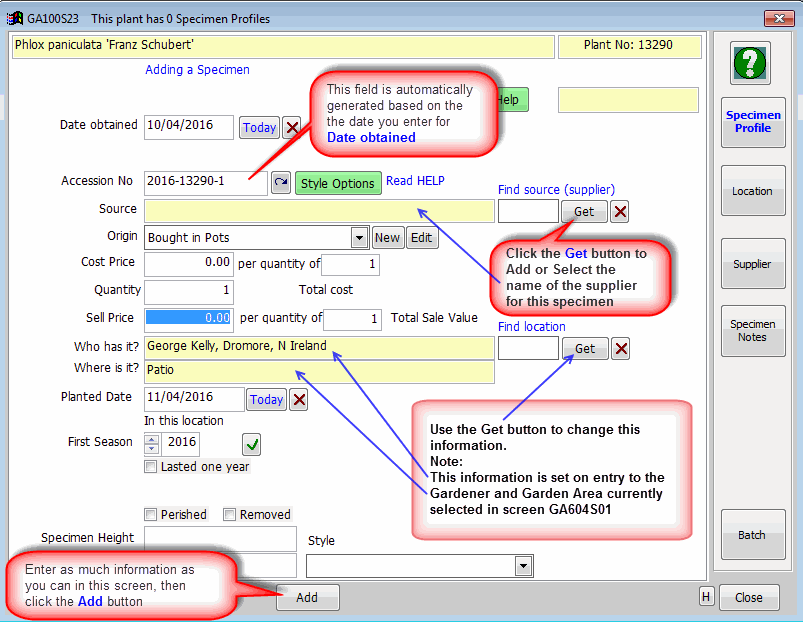
- Adding a specimen - Screenshot GA100S23-1
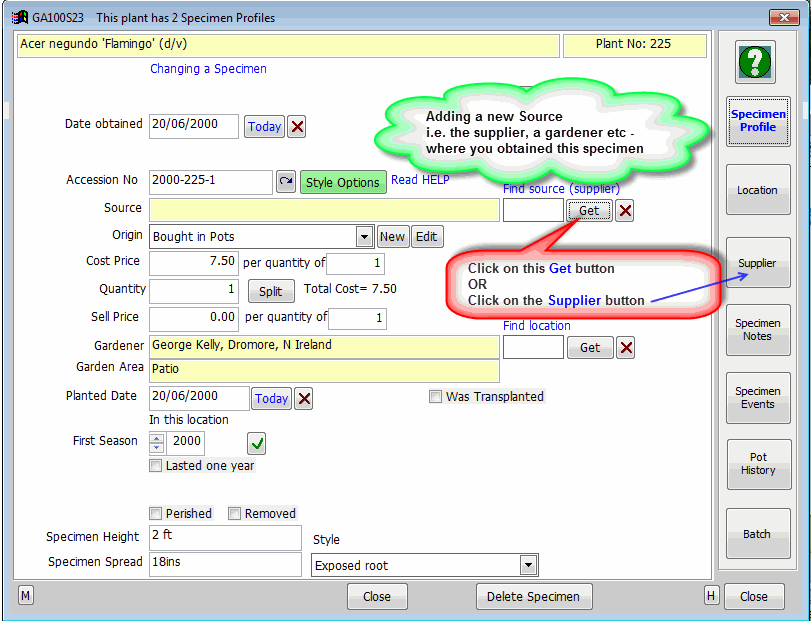
- Adding and selecting a NEW Source (supplier) In screen GA100S23
As shown in Screenshot GA100S23-2 click the Supplier button
The Supplier page will appear
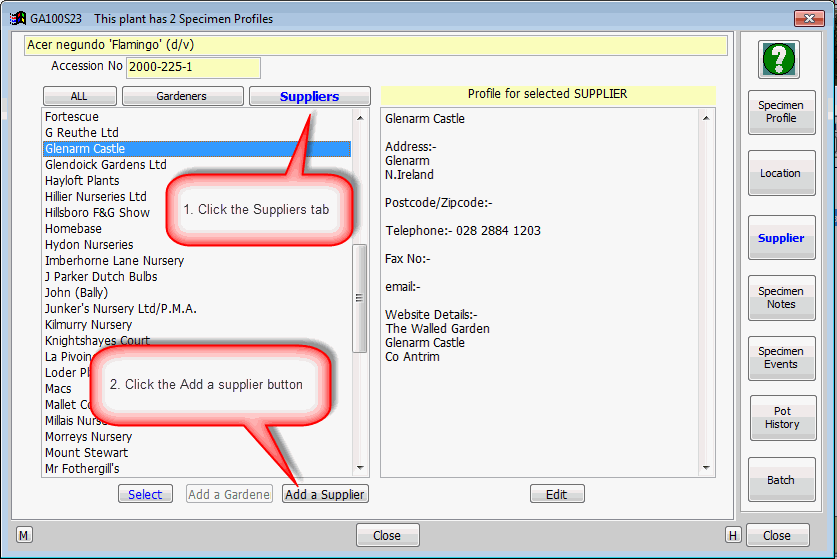
As shown in Screenshot GA100S23-4 click the
Suppliers button, then click the Add a Supplier
button.
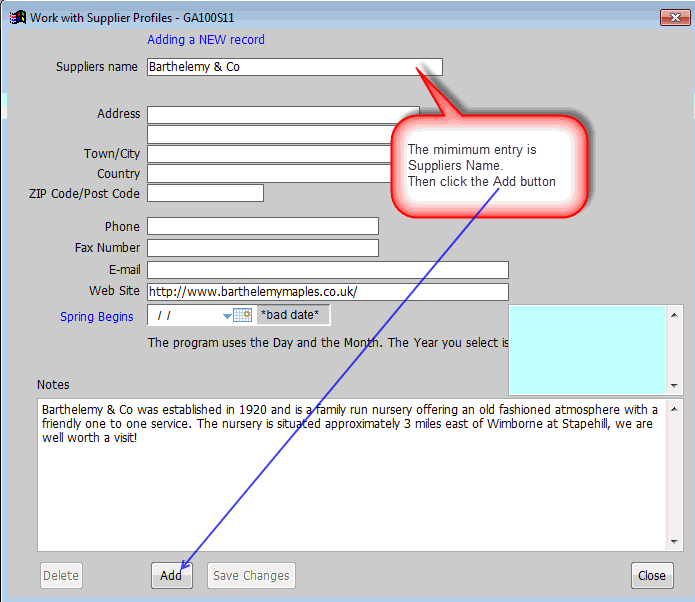
Screen GA100S11 appears.
As shown in Screenshot GA100S11-1 enter data then click the Add button
Screen GA100S23 will reappear
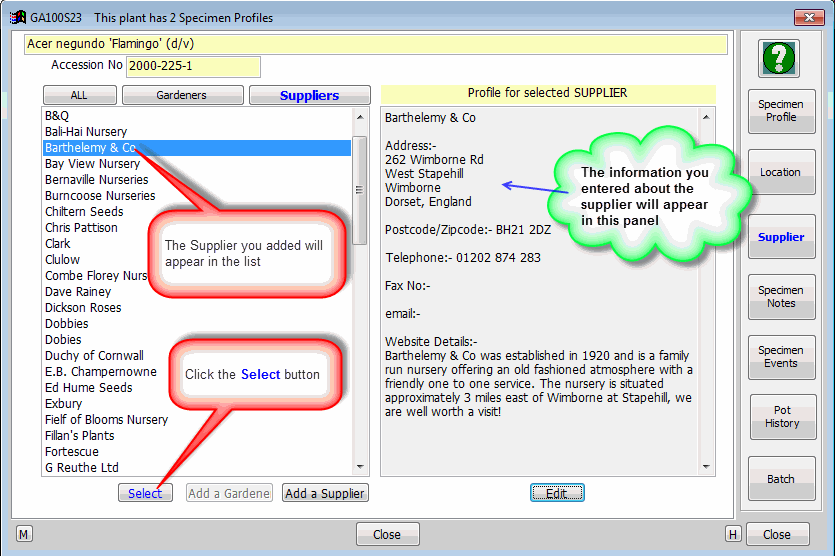
As shown in Screenshot GA100S23-3 click the Select
button.
The Specimen Profile page of GA100S23 will reappear and the new Supplier will be shown.
- Selecting an existing Source In screen GA100S23
Click the Supplier button.
As shown in Screenshot GA100S23-3 click the Select button.
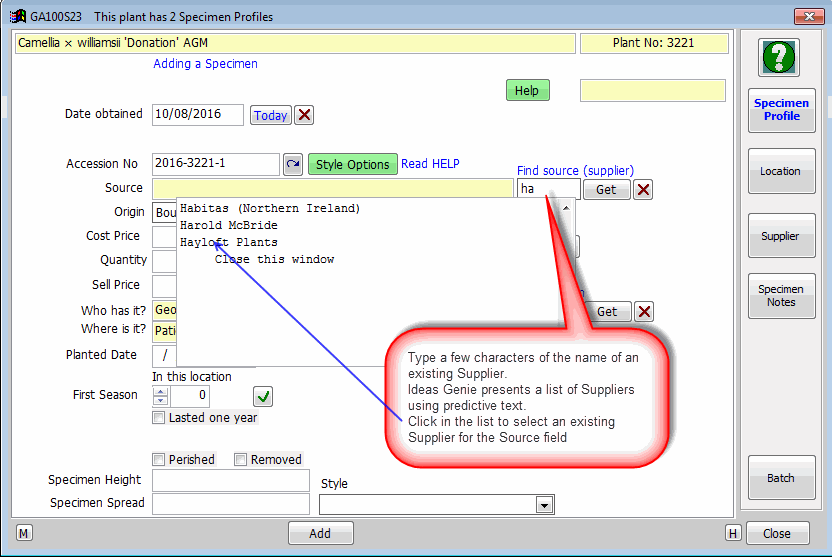
- Shortcut method for Selecting an existing Source In screen GA100S23, using the Find Source feature
Referring to Screenshot GA100S23-5 type a few characters of the name of an existing supplier.
Ideas Genie presents a list of matching Suppliers using predictive
text.
Click in the list to select an existing Supplier for the Source field
|
