|
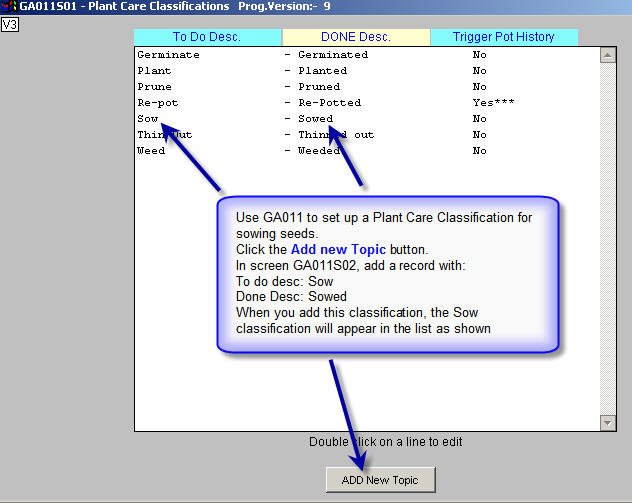
First we need to create a Plant Care Classification for Sowing seed
- Start the program Plant care Classifications - GA011
- Click the Add new topic button
- Type Sow in the To do description field
- Type Sowed in the Done Description field
- Click the Add button
- The Sowing seed record should show up in your listing something like this:
Screenshot
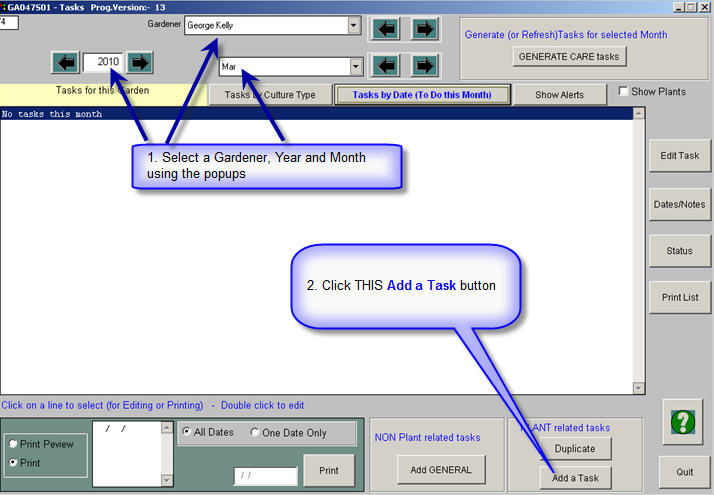
Now to add our first task
- Start the program Tasks - GA047
- Screen GA047S01 appears
Screenshot
- Select the correct Gardener
- Select the correct Year
- Select the correct Month (can be changed later)
- Click the Add a Task button, bottom right of screen
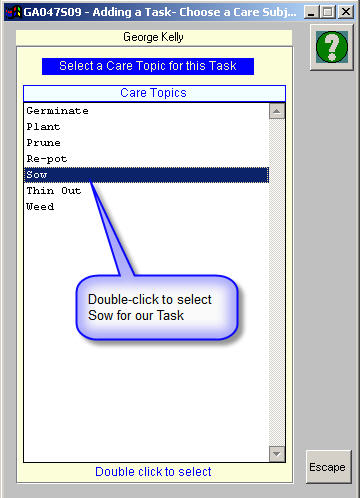
- Screen GA047S09 appears
Screenshot
- Double click on Sow (classification in the list)
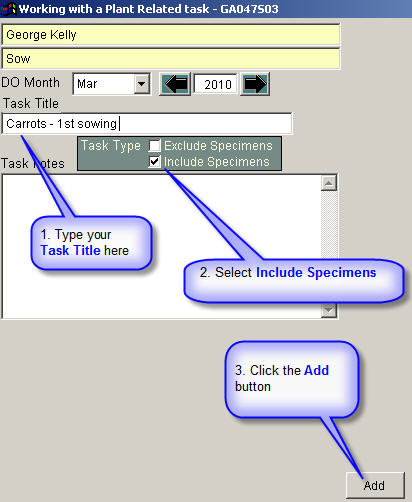
- Screen GA047S03 appears
Screenshot
- Enter Carrots - 1st sowing in the Task Title field
- Set Task type to Include Specimens (its the default setting)
- You can leave the Task Notes field blank at this stage
- Click the Add button
- You return to the initial screen GA047S01
- To see the task you have added, click on the Tasks by Culture type tab
Screenshot
Refining your task
- Now click on the Edit Task button in screen GA047S01 (see previous screenshot)
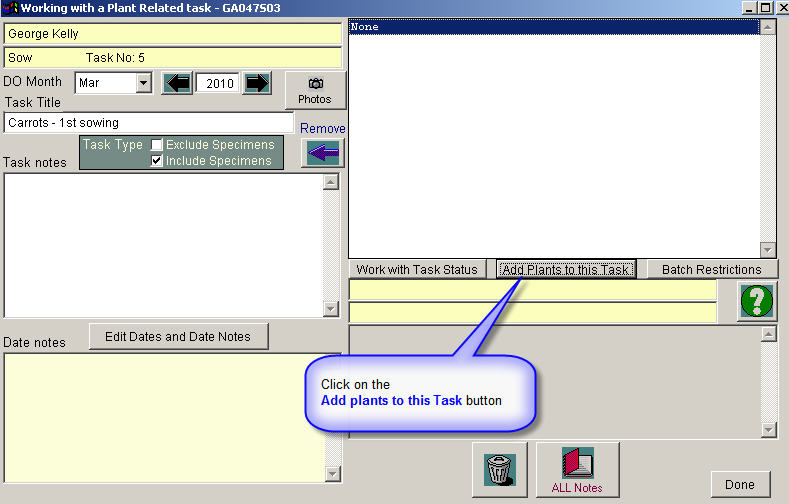
- Screen GA047S03 appears again, but now there are extra fields visible
Screenshot
- Click the Add plants to this task button
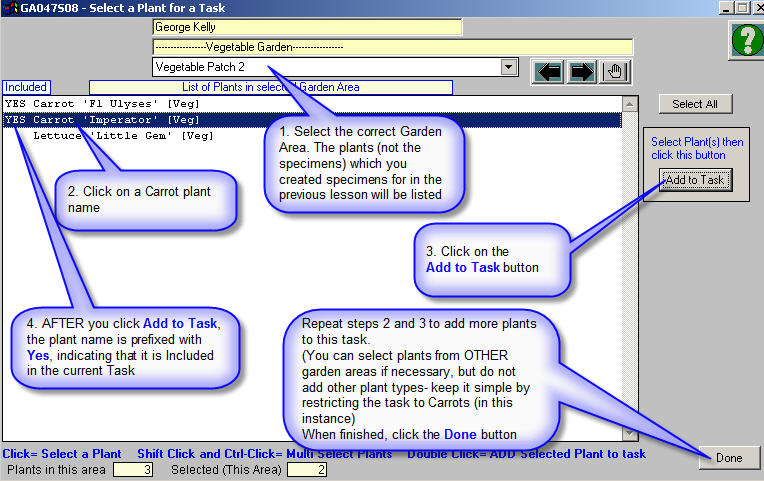
- Screen GA047S08 appears
Screenshot
- Select the correct Garden Area (where your plants with specimens are located)
- The Plants (not specimens) in that Garden Area are listed
- 1) Click to select a plant in the list
- 2) Click Add to Task button
- Note that the plant now has the prefix Yes
This indicates thet the plant is Included in your task
- Repeat 1) and 2) for other plants for this task
Keep it simple by adding only plants of the same type to your task
e.g. Dont mix Carrots with anything else (like Lettuce)
With this approach,
- When you come to add Notes to go with your task, you only have to deal with one set of Cultural properties
- Click the Done button when you have finished adding plants to your task
- A dialog box flashes up with the message:
Please review status in next screen
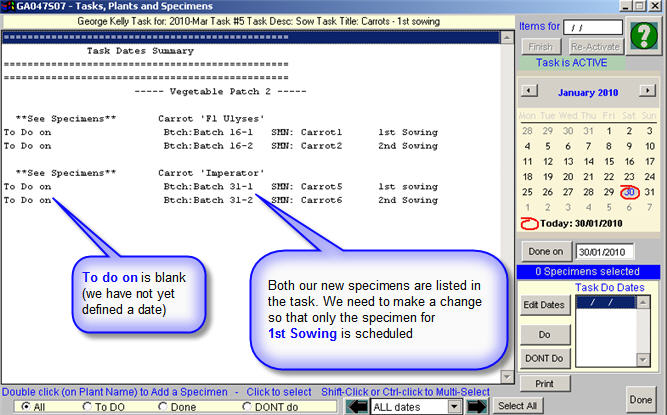
- When you continue, Screen GA047S07 appears
Reviewing Status (first look)
- On our first look at Status for our task in GA047S07, a few things are apparent
Screenshot
1) To do on doesnt have a date
2) ALL of our specimens for Carrots are listed. We want to limit this task to 1st Sowing for both our Carrot varieties
We have some more work to do
Defining dates
- In screen GA047S07 (above), click the Done button
- Screen GA047S03 appears (again)
- Our plants for this task are listed
- Click the Edit Dates and Date Notes button
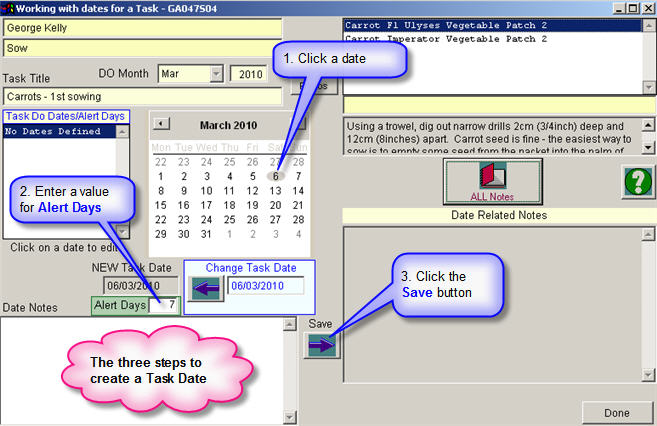
- Screen GA047S04 appears
Screenshot
- There are three steps to adding a Task date
- 1) Click a date in the Calendar control
- 2) Enter a value for Alert days (0= no alert)
- 3) Click the Save button
Now we need to find some information for our task
- In the Task do dates/Alert days list in GA047S04, click on the Date/Alert line
- This puts the Task Date into Edit mode
Screenshot
In Edit mode, the Save button is enabled
Always remember to click on a Date
if you need to make any changes related to tgis task date e.g. The date itself, the Alert Days value, the Date related Notes
- Now click on the All Notes button
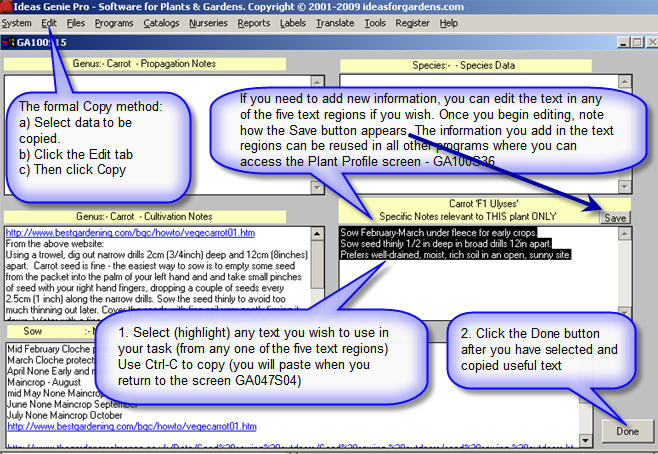
- Screen GA100S15 appears
Screenshot
- This screen has five panels
- They contain any information you may have already entered about the Genus, Species, Cultivation and the Plant (Variety)
These fields also appear in GA100S36 (the plant profile screen)
The lower panel comes from your Global Editing screens GA100S30PC (=Plant Care)
This is where you call
upon the information entered during Lesson 2 (Google button Surfboard etc)
- Select data to be used in your task
- Use your preferred method to copy the data (e.g.Ctrl-C)
- Click the Done button
- Screen GA047S04 reappears
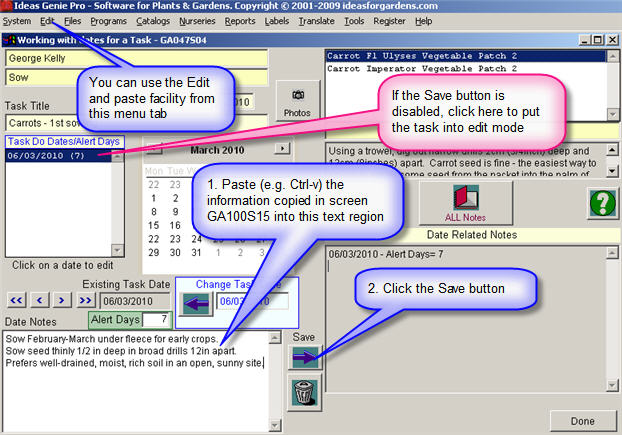
Pasting the information into our task
- We are still in edit mode in screen GA047S04
Screenshot
- Paste the data into the Date Notes text region
- Click the Save button
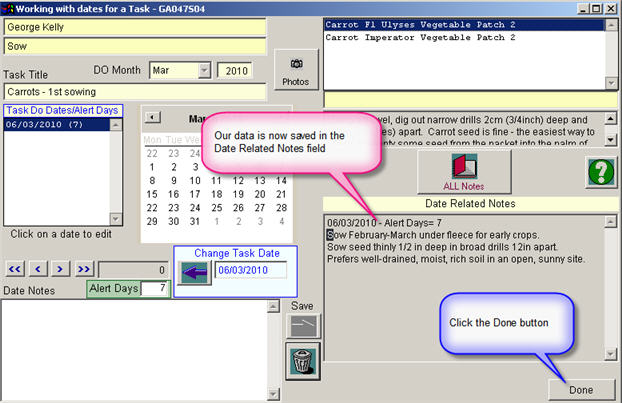
- Our data moves into the appropriate field
Screenshot
- Click the Done button
- Again, a dialog box flashes up with the message:
Please review status in next screen
- When you continue, Screen GA047S07 appears
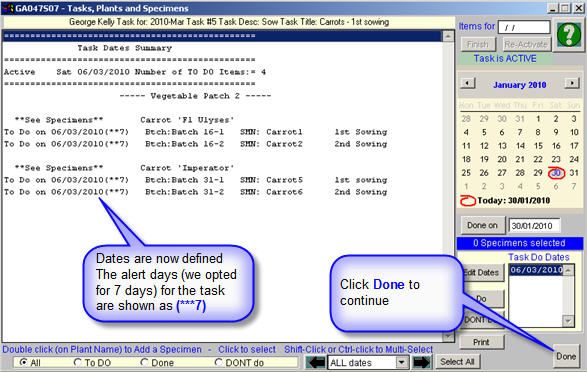
Reviewing our updated status
- Now we have dates showing in the Status screen! (GA047S07
Screenshot
- Now we need to refine our task so that only our 1st Sowings specimens are scheduled
- Click the Done button
- Screen GA047S03 reappears
Using the Batch Restrictions feature to restrict the number of specimens scheduled in our task
- In GA047S03, click the Batch Restrictions button
Screenshot
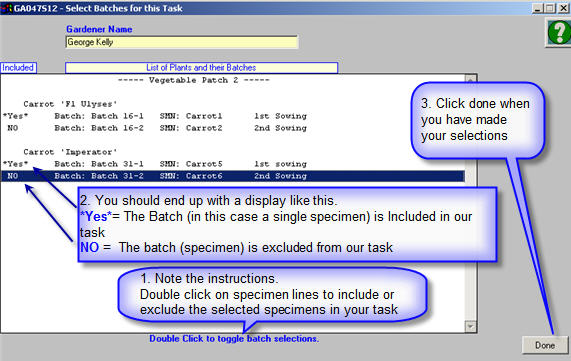
- Screen GA047S12 appears
Screenshot
- When you enter screen GA047S12, all items are prefixed with Yes, meaning they are Included in the task. We need to exclude the 2nd Sowing specimens
- Note the instructions below the list:
Double click to toggle batch selections
- Double click on the Batch lines (which in our example is one specimen)
You may have to double click twice per line
Note how the status changes from *Yes* to No
- Click the Done button when you have the prefix *Yes* for each of your 1st Sowings and NO against all your 2nd Sowings
- Again, a dialog box flashes up with the message:
Please review status in next screen
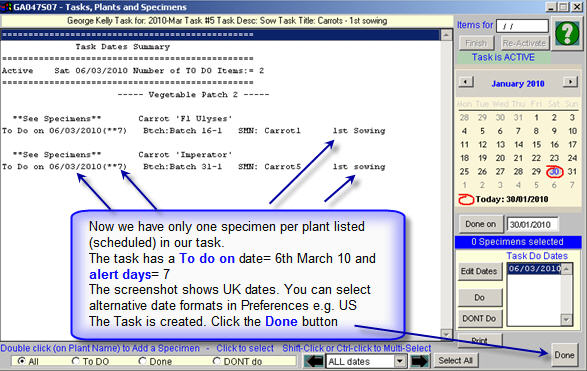
- When you continue, Screen GA047S07 appears
Screenshot
- The Task is now set up
- Click the Done button
- Screen GA047S03 appears
(We are now finished in that screen)
- Click the Done button
- The initial screen of the Tasks program (GA047S01) reappears
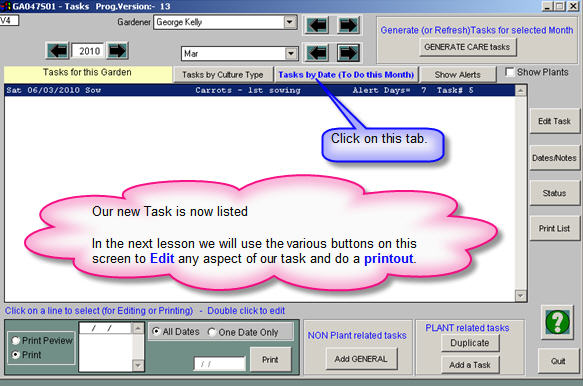
In the initial screen GA047S01, click on the Tasks by date (to do this month) button
Screenshot
Voila, your task is scheduled!
In the next sessions we will use the various buttons to Edit and Print our task.
Then we will use the program to maintain the status of our task
|
