|
Later in this project we shall be recording Events in the growing cycle of our vegetables.
To record Events using Ideas Genie, you need to create specimens for your plants.
Think of a plant as a name. Its an item in your database. It does not exist.
Think of a specimen as a living creation. Its something REAL, which youve bought,
propagated or in this project, grown (or will grow) from seed
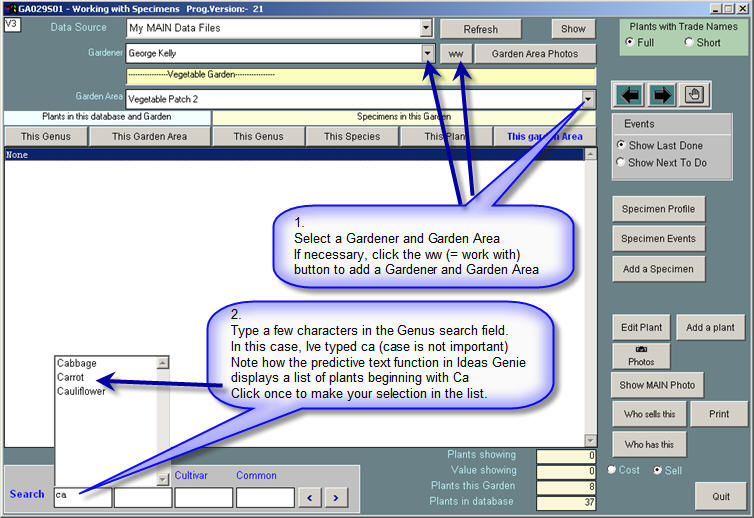
- Start GA029
- Select a Gardener and a Garden Area
Select the Garden Area where this vegetable is to be grown
- Click the This Genus tab
- Enter a few characters of one of your plants in the Genus search field
In this example I shall use Carrot
When I enter Ca a list appears
- Click Carrot in the list
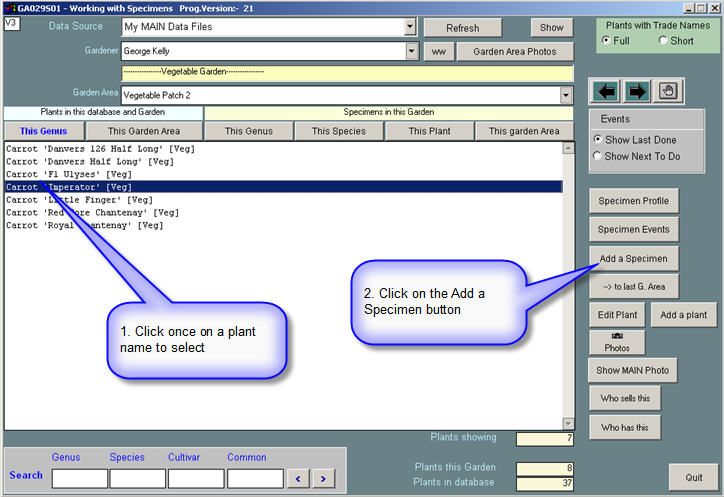
- A list of Carrots in my database is displayed
Screenshot
- Click once to select a plant
In this example I select Carrot Imperator
- Click the Add a specimen button
Screenshot
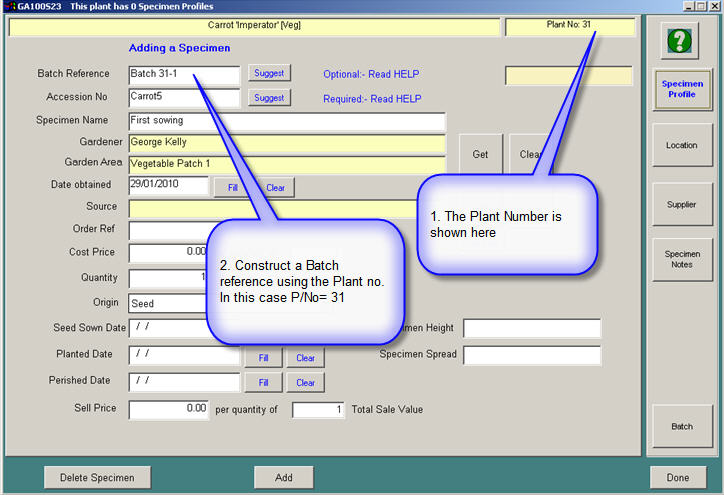
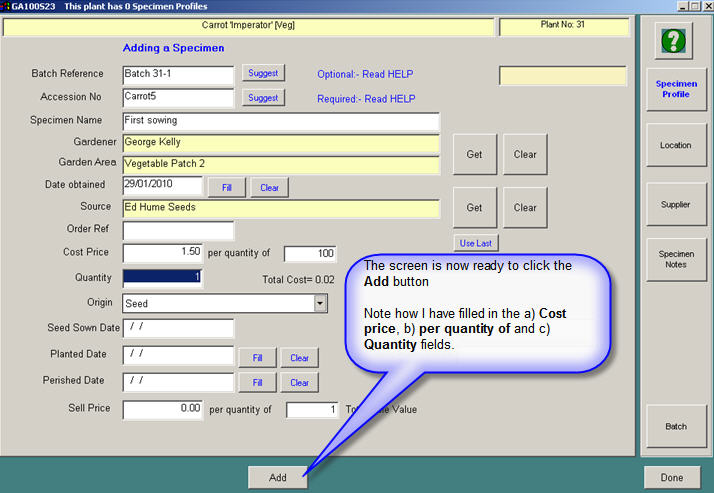
- Screen GA100S23 appears
- Notice the Plant Number shown - top right region of screen
It is a unique number for every plant in your database
Use that number as a Batch reference
In my case its #31, so I enter
- Batch 31-1
31= Plant number (in my example)
1= 1st batch
Screenshot
- The program fills the Accession Number field with an automatically generated name
Use that name
In this example it is Carrot5
- We also need a Specimen name
Use 1st Sowing
- Select Seed from the Origin pop-up
- Note the buttons on the right of the screen
Screenshot
Clicking these buttons presents any one of four pages for entering data for your specimen
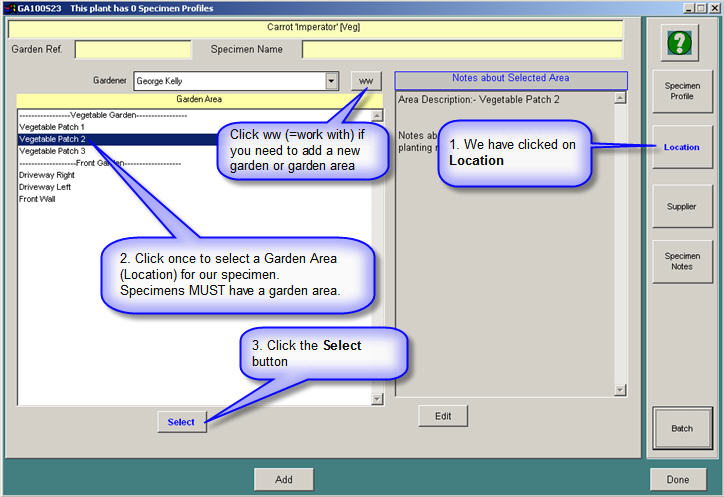
- a) Click Location button - select a Gardener and Garden Area for your specimen
Screenshot
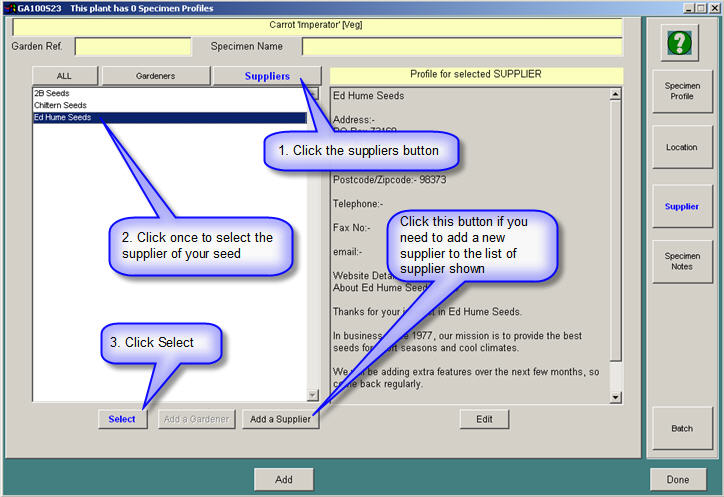
- b) Click Supplier - select your seed Supplier
Screenshot (Selecting a supplier)
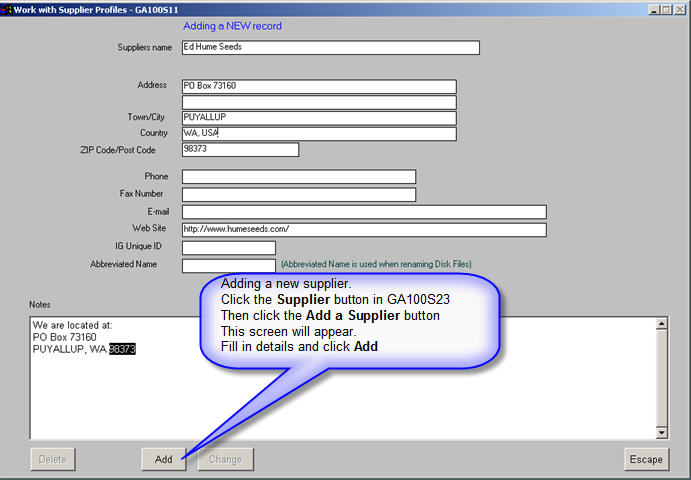
Screenshot (Adding a new supplier)
- c) Click Specimen notes - type your notes in this memo field
You dont have to do it now. You can edit and add this at any time later.
- d) Click Specimen Profile - you are back to the screen where we have been adding our data
Screenshot (just before adding)
- Click the Add button
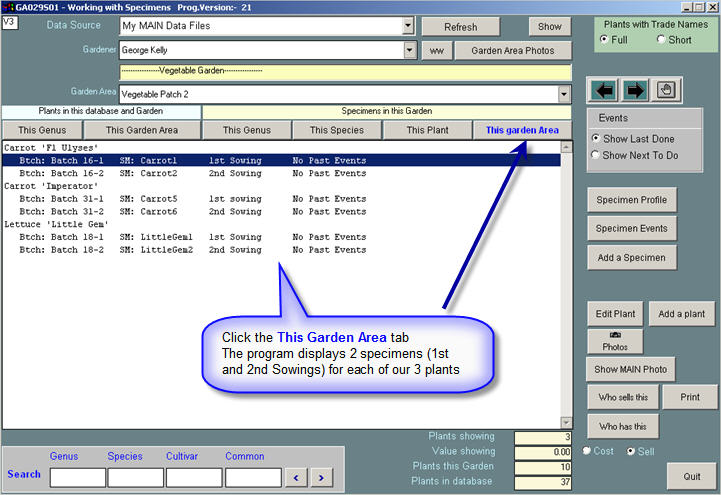
The initial screen (GA029S01) appears
- Click the This Garden Area tab
- The specimen you added now appears in the list
Screenshot
Repeat this process for a second specimen
- In screen GA029S01, click Add a specimen
- In screen GA100S23, enter a Batch Ref something like this
- Batch 31-2
31= same Plant number (in my example)
2= 2nd batch
- Accept the Acession Number generated by the program
- Enter 2nd Sowing in the Specimen name field
- Fill out the other details
- Click the Add button
Continue to add 2 specimens for each of 3 plants
When you have done that, you will have a screen something like this:
Screenshot
|
